Configuring Google Workspace (G Suite) as an IdP for SAFIRE
Google Workspace for Education (formally G Suite formerly Google Apps) includes a limited SAML identity provider. Because SAFIRE is a hub-and-spoke federation, this can potentially be configured to work as an identity provider within SAFIRE — the federation will do the work of integrating service providers, avoiding the need to add each one individually.
Note that we use G Suite’s Primary Email for eduPersonPrincipalName (and Name ID) because it corresponds to the username people log in with. G Suite allows this to be reassigned after a delay. However, to meet SAFIRE’s requirements, please make sure ensure you never reassigned email addresses.
Add a SAML app to G Suite
Log into the G Suite Admin console at admin.google.com and click on Apps > SAML apps. Then select “Add a service/App to your domain” (or click the + button).
Step 1
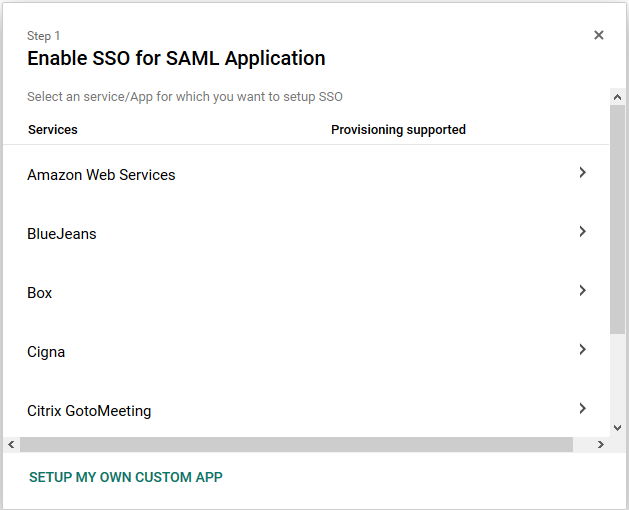
G Suite will offer you the choice of a number of service providers, but you should select “Setup my own custom app” to add SAFIRE’s details.
Step 1
Step 2
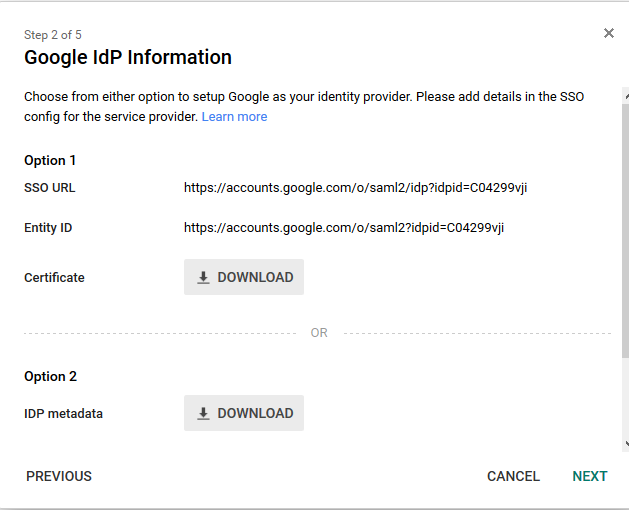
Download G Suite’s IdP metadata (Option 2) and save this for later. You’ll need to hand-edit the XML in order to comply with SAFIRE’s metadata requirements and pass validation. However what you get from this stage is a useful starting point.
Step 2
Step 3
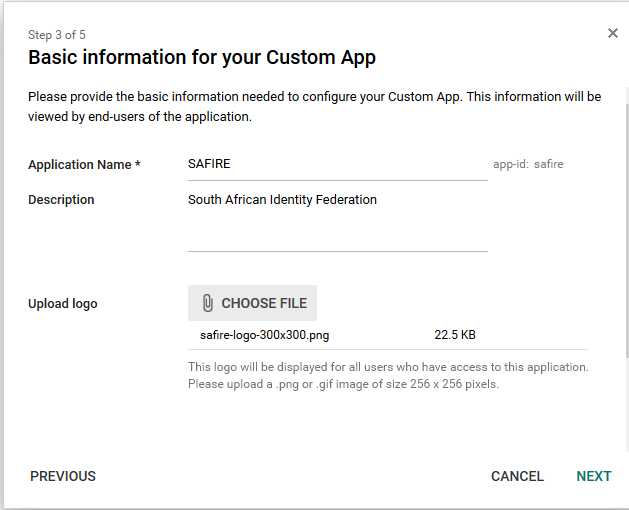
Configure the basic information for the Custom App. You want to add information that tells your users that they’re connected to the SAFIRE federation, but feel free to customise this in a way that makes sense to you. If you need a logo, you can use this one.
Step 3
Step 4
Add the federation hub’s details, as derived from metadata. The values you need to complete this step are:
| Field | Value |
|---|---|
| ACS URL | https://iziko.safire.ac.za/module.php/saml/sp/saml2-acs.php/safire-sp |
| Entity ID | https://iziko.safire.ac.za/ |
| Start URL | leave empty |
| Signed Response | unchecked |
| Name ID | Basic information / Primary Email |
| Name ID Format | Persistent |
Which should then look something like this: Step 4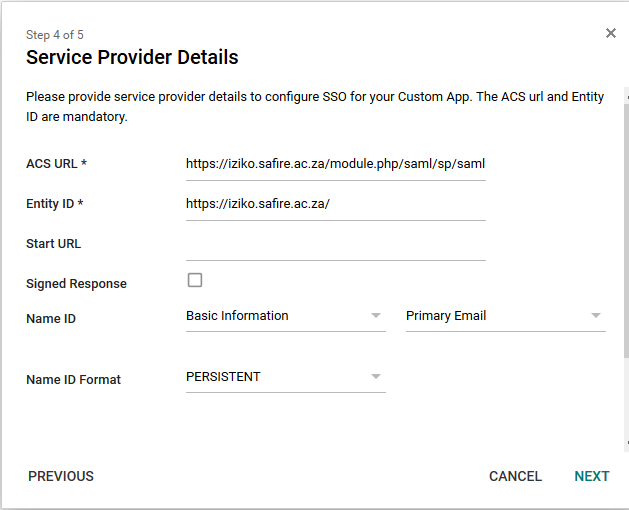
Step 5
Add attribute mappings to map the G Suite directory attributes into SAML attributes SAFIRE understands. The mappings available are quite limited, but you should be able to map at least the required attributes.
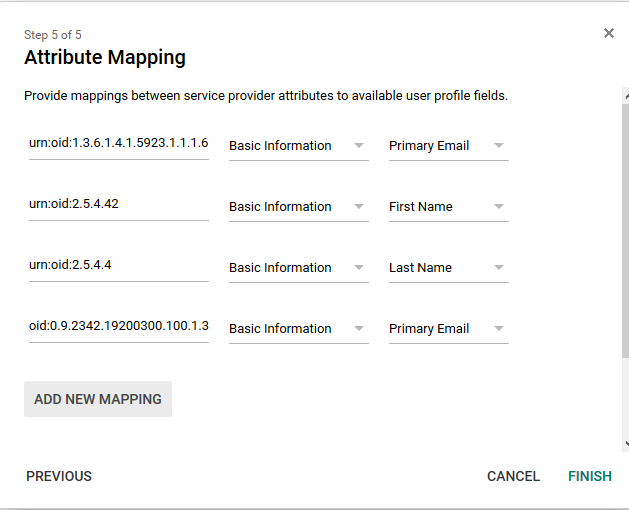
Step 5
Note that we’ve specified the mapping using urn:oid format, rather than the friendly names that get displayed. The four mappings shown above are as follows:
| Application attribute (OID) | Category | G Suite User Field | SAFIRE Name |
|---|---|---|---|
| urn:oid:1.3.6.1.4.1.5923.1.1.1.6 | Basic information | Primary Email | eduPersonPrincipalName |
| urn:oid:2.5.4.42 | Basic information | First Name | givenName |
| urn:oid:2.5.4.4 | Basic information | Last Name | sn |
| urn:oid:0.9.2342.19200300.100.1.3 | Basic information | Primary Email |
If you’ve extended the schema in G Suite to store custom attributes, you may be able to make more mappings. (In particular, eduPersonAffiliation would be desirable)
Finishing up & turning on
If all worked successfully, you should get a confirmation message telling you the details were saved and reminding you to upload your metadata.
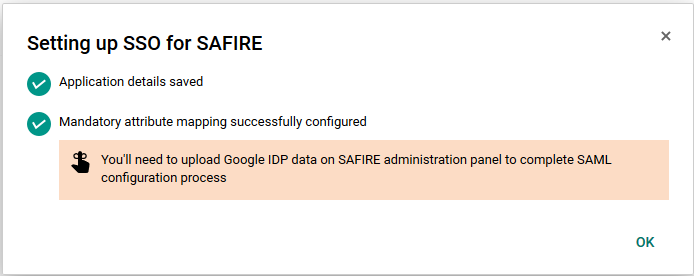
Finished
After which you should have a new “SAFIRE” application listed. Note that by default this application is turned OFF. You will need to turn it on for those users or organisations you wish to authenticate.
Edit the G Suite IdP metadata
Open the IdP metadata you saved in step 2 in your favourite text editor, and customise it for SAFIRE.
You’ll need to add scoping and user interface details towards the top (just inside <md:IDPSSODescriptor>, before <md:KeyDescriptor>).
<md:Extensions>
  <mdui:UIInfo xmlns:mdui="urn:oasis:names:tc:SAML:metadata:ui">
    <mdui:DisplayName xml:lang="en">Example University</mdui:DisplayName>
    <mdui:Description xml:lang="en">Example University G Suite SSO</mdui:Description>
    <mdui:InformationURL xml:lang="en">https://example.ac.za/</mdui:InformationURL>
  </mdui:UIInfo>
  <shibmd:Scope xmlns:shibmd="urn:mace:shibboleth:metadata:1.0" regexp="false">example.ac.za</shibmd:Scope>
  <shibmd:Scope xmlns:shibmd="urn:mace:shibboleth:metadata:1.0" regexp="false">example.ac.za.test-google-a.com</shibmd:Scope>
</md:Extensions>
The <shibmd:Scope> elements should list all the domains and domain aliases you have configured in G Suite. You can, of course, add other MDUI information (such as a logo) too if you wish.
Next add another <md:NameIDFormat> stanza immediately under the existing one
<md:NameIDFormat>urn:oasis:names:tc:SAML:2.0:nameid-format:transient</md:NameIDFormat>
Finally, you will also need to add your organisation details and contact addresses towards the end (between the closing </md:IDPSSODescriptor> and the final </md:EntityDescriptor>)
<md:Organization>
  <md:OrganizationName xml:lang="en">Example University</md:OrganizationName>
  <md:OrganizationDisplayName xml:lang="en">Example University</md:OrganizationDisplayName>
  <md:OrganizationURL xml:lang="en">https://example.ac.za/</md:OrganizationURL>
</md:Organization>
<md:ContactPerson contactType="support">
  <md:GivenName>Example University Help Desk</md:GivenName>
  <md:EmailAddress>support@example.ac.za</md:EmailAddress>
  <md:TelephoneNumber>+27.21.114.0000</md:TelephoneNumber>
</md:ContactPerson>
<md:ContactPerson contactType="technical">
  <md:GivenName>Example University IdM</md:GivenName>
  <md:EmailAddress>idm@example.ac.za</md:EmailAddress>
</md:ContactPerson>
The resulting metadata should validate correctly and can be submitted to the federation.
